
A disk image is a verbatim copy of all sectors of all tracks of a floppy disk. A disk image therefore includes not only the contents of all files on the disk but also the directory information and the unused blocks of the disk. An image is exactly 32 * 77 * 128 bytes in size. It is useful to create a disk image from a floppy disk for many reasons: as a backup, to easily share disks across internet, and to permanently preserve the contents of vulnerable floppies.
I have collected disk images from a number of sources:
- the ECA system (2 disks)
- the HM system (33 disks)
- the system of the University of Stuttgart museum (21 disks)
- the Millennium area on bitsavers.org (82 disks)
- the Tektronix 8002 area on bitsavers.org (29 disks)
ECA system
Using a hack (see Dumping a disk for details) I created images of the two floppies that came with the ECA system. Click the images for larger versions.
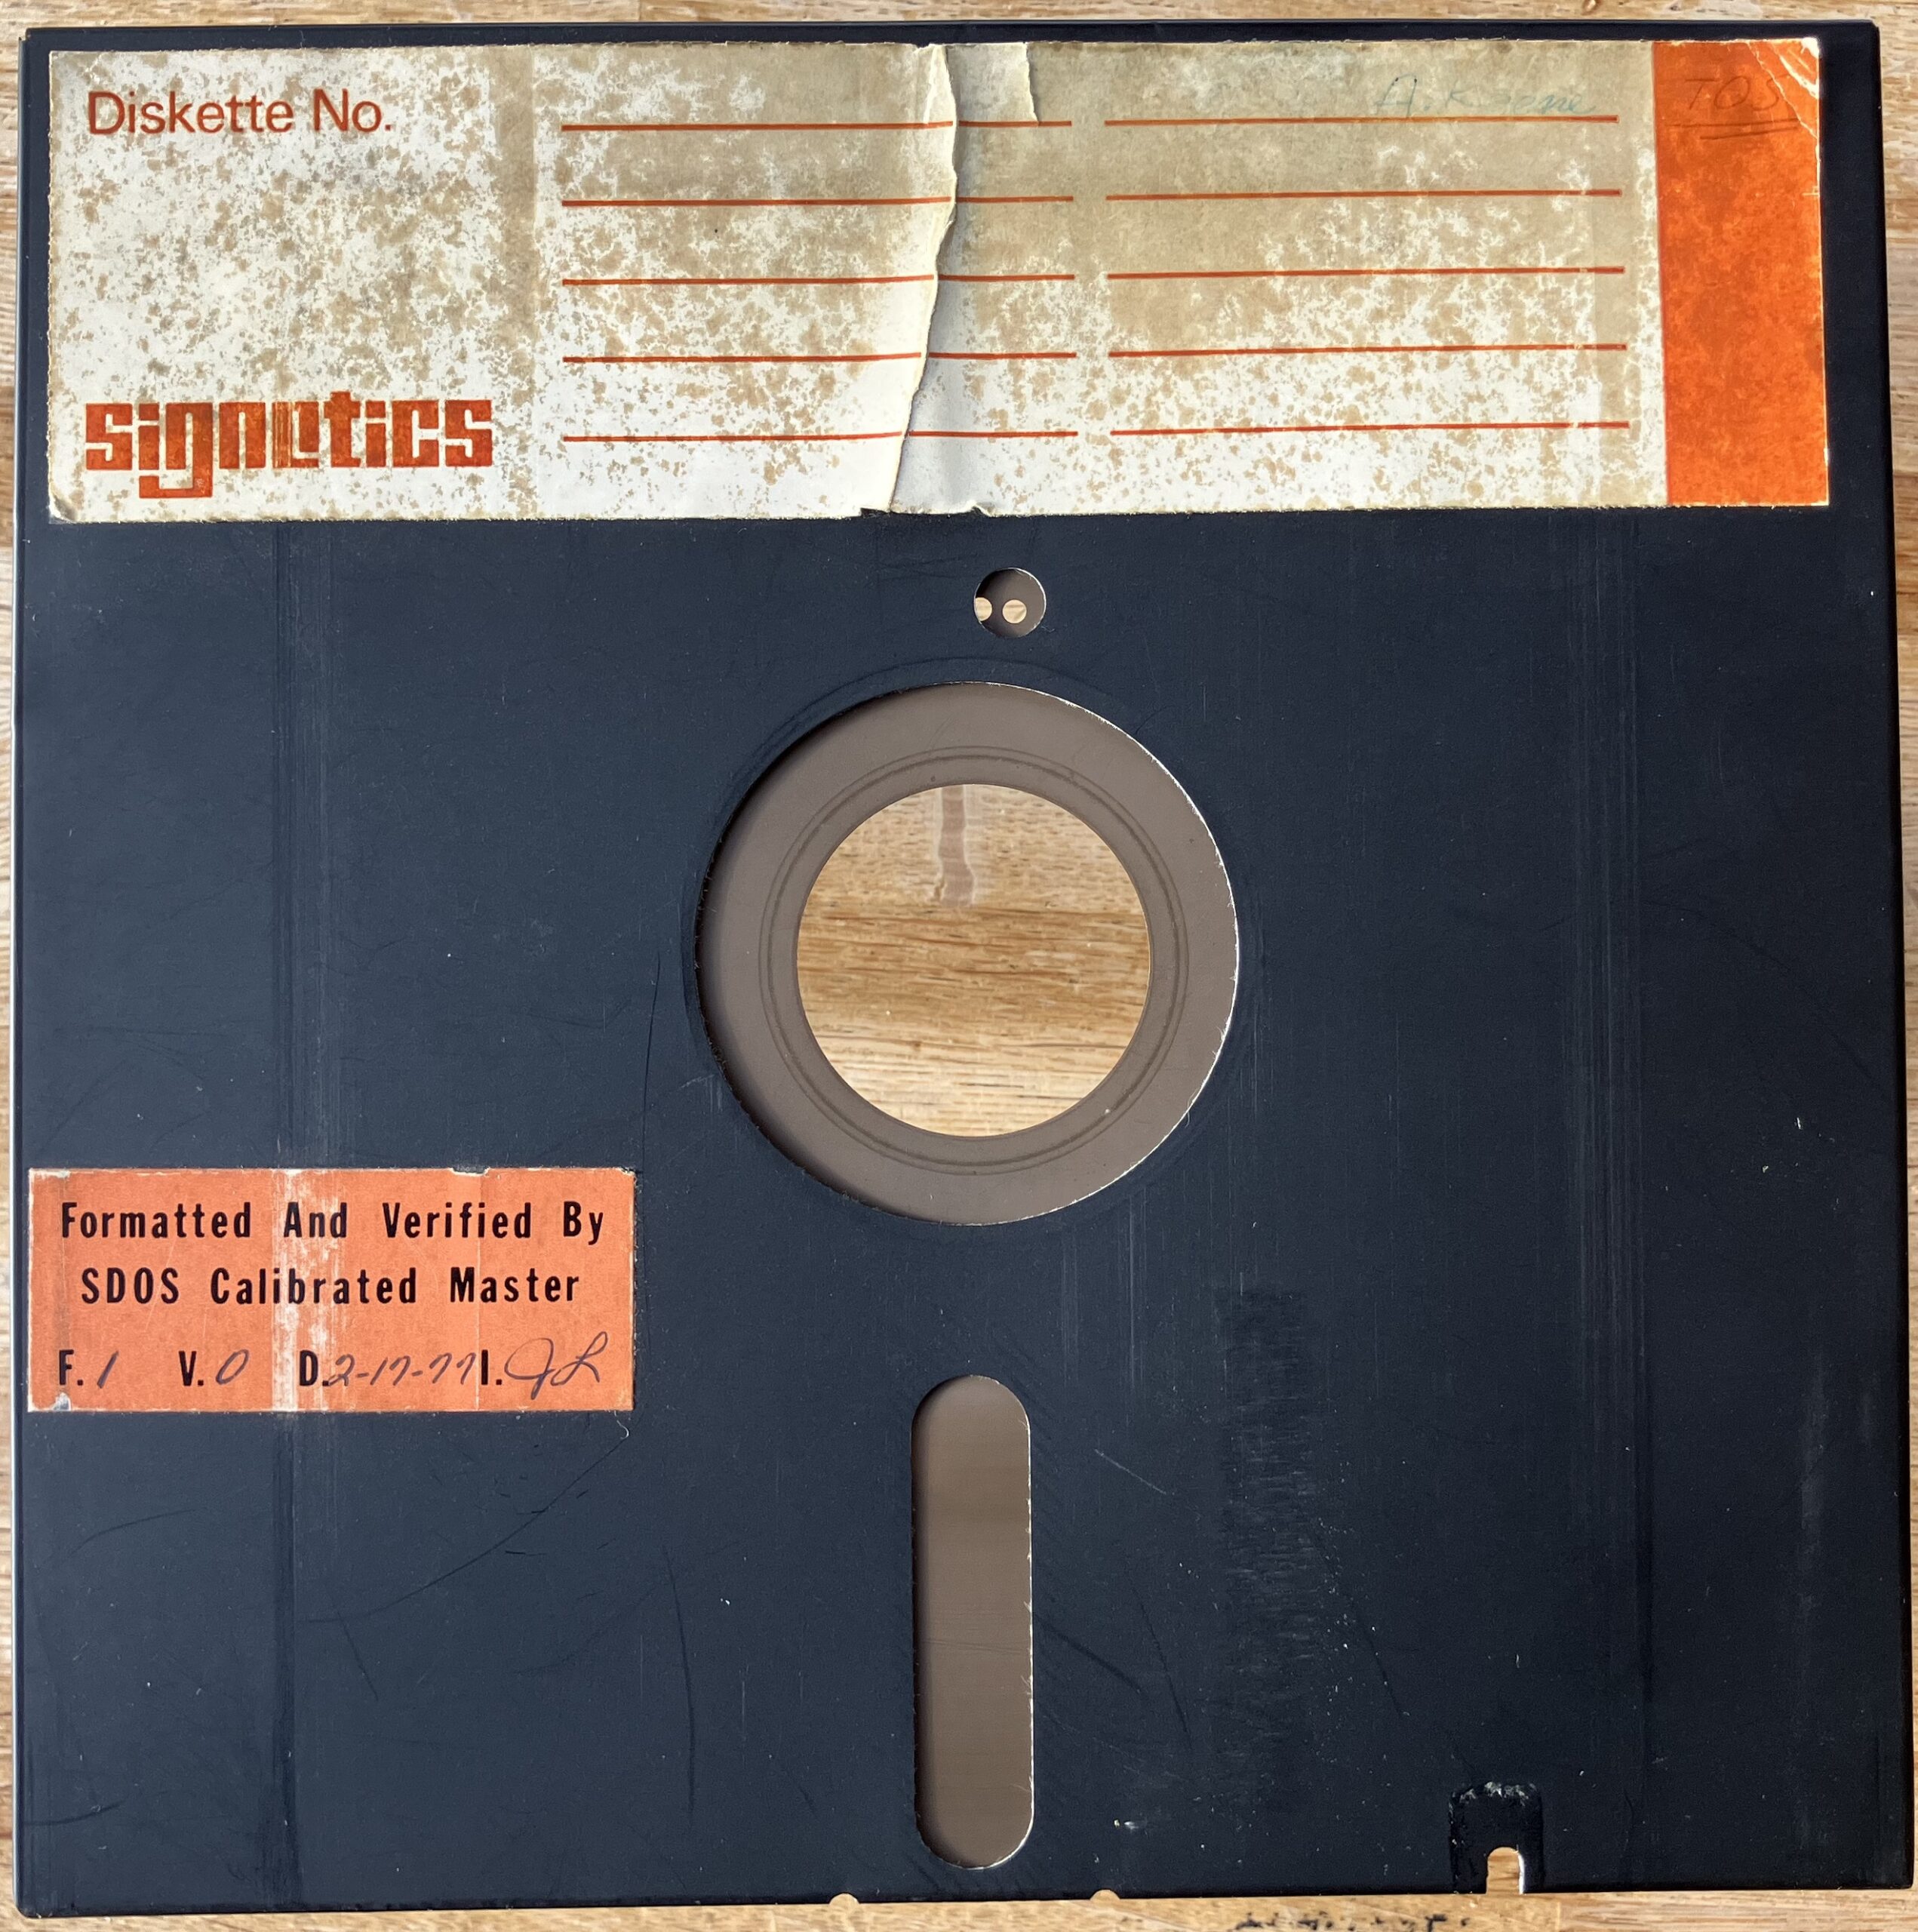
This image contains a bootable version of TOS version 1. Download the image and its file contents using the buttons below. See note below.
This image contains backups of working files of the previous owner. Download the image and the file contents using the buttons below.
Note: the Signetics system disk contains unrecoverable errors on sector 16 of tracks 68, 69, 70 and 71, due to a scratch. This affects two files: HEXSOC and STAR;S. File HEXSOC is a dump made using WHEX of file AKSOC;B on the data disk. “AK” presumably are the initials of the previous user; the name “A. Koene” is written on the labels. So no unrecoverable data is lost here. File STAR;S is an assembler source file. An assembled version can be found in STRSHP;E. A disassembly of that file will probably recover the missing parts.
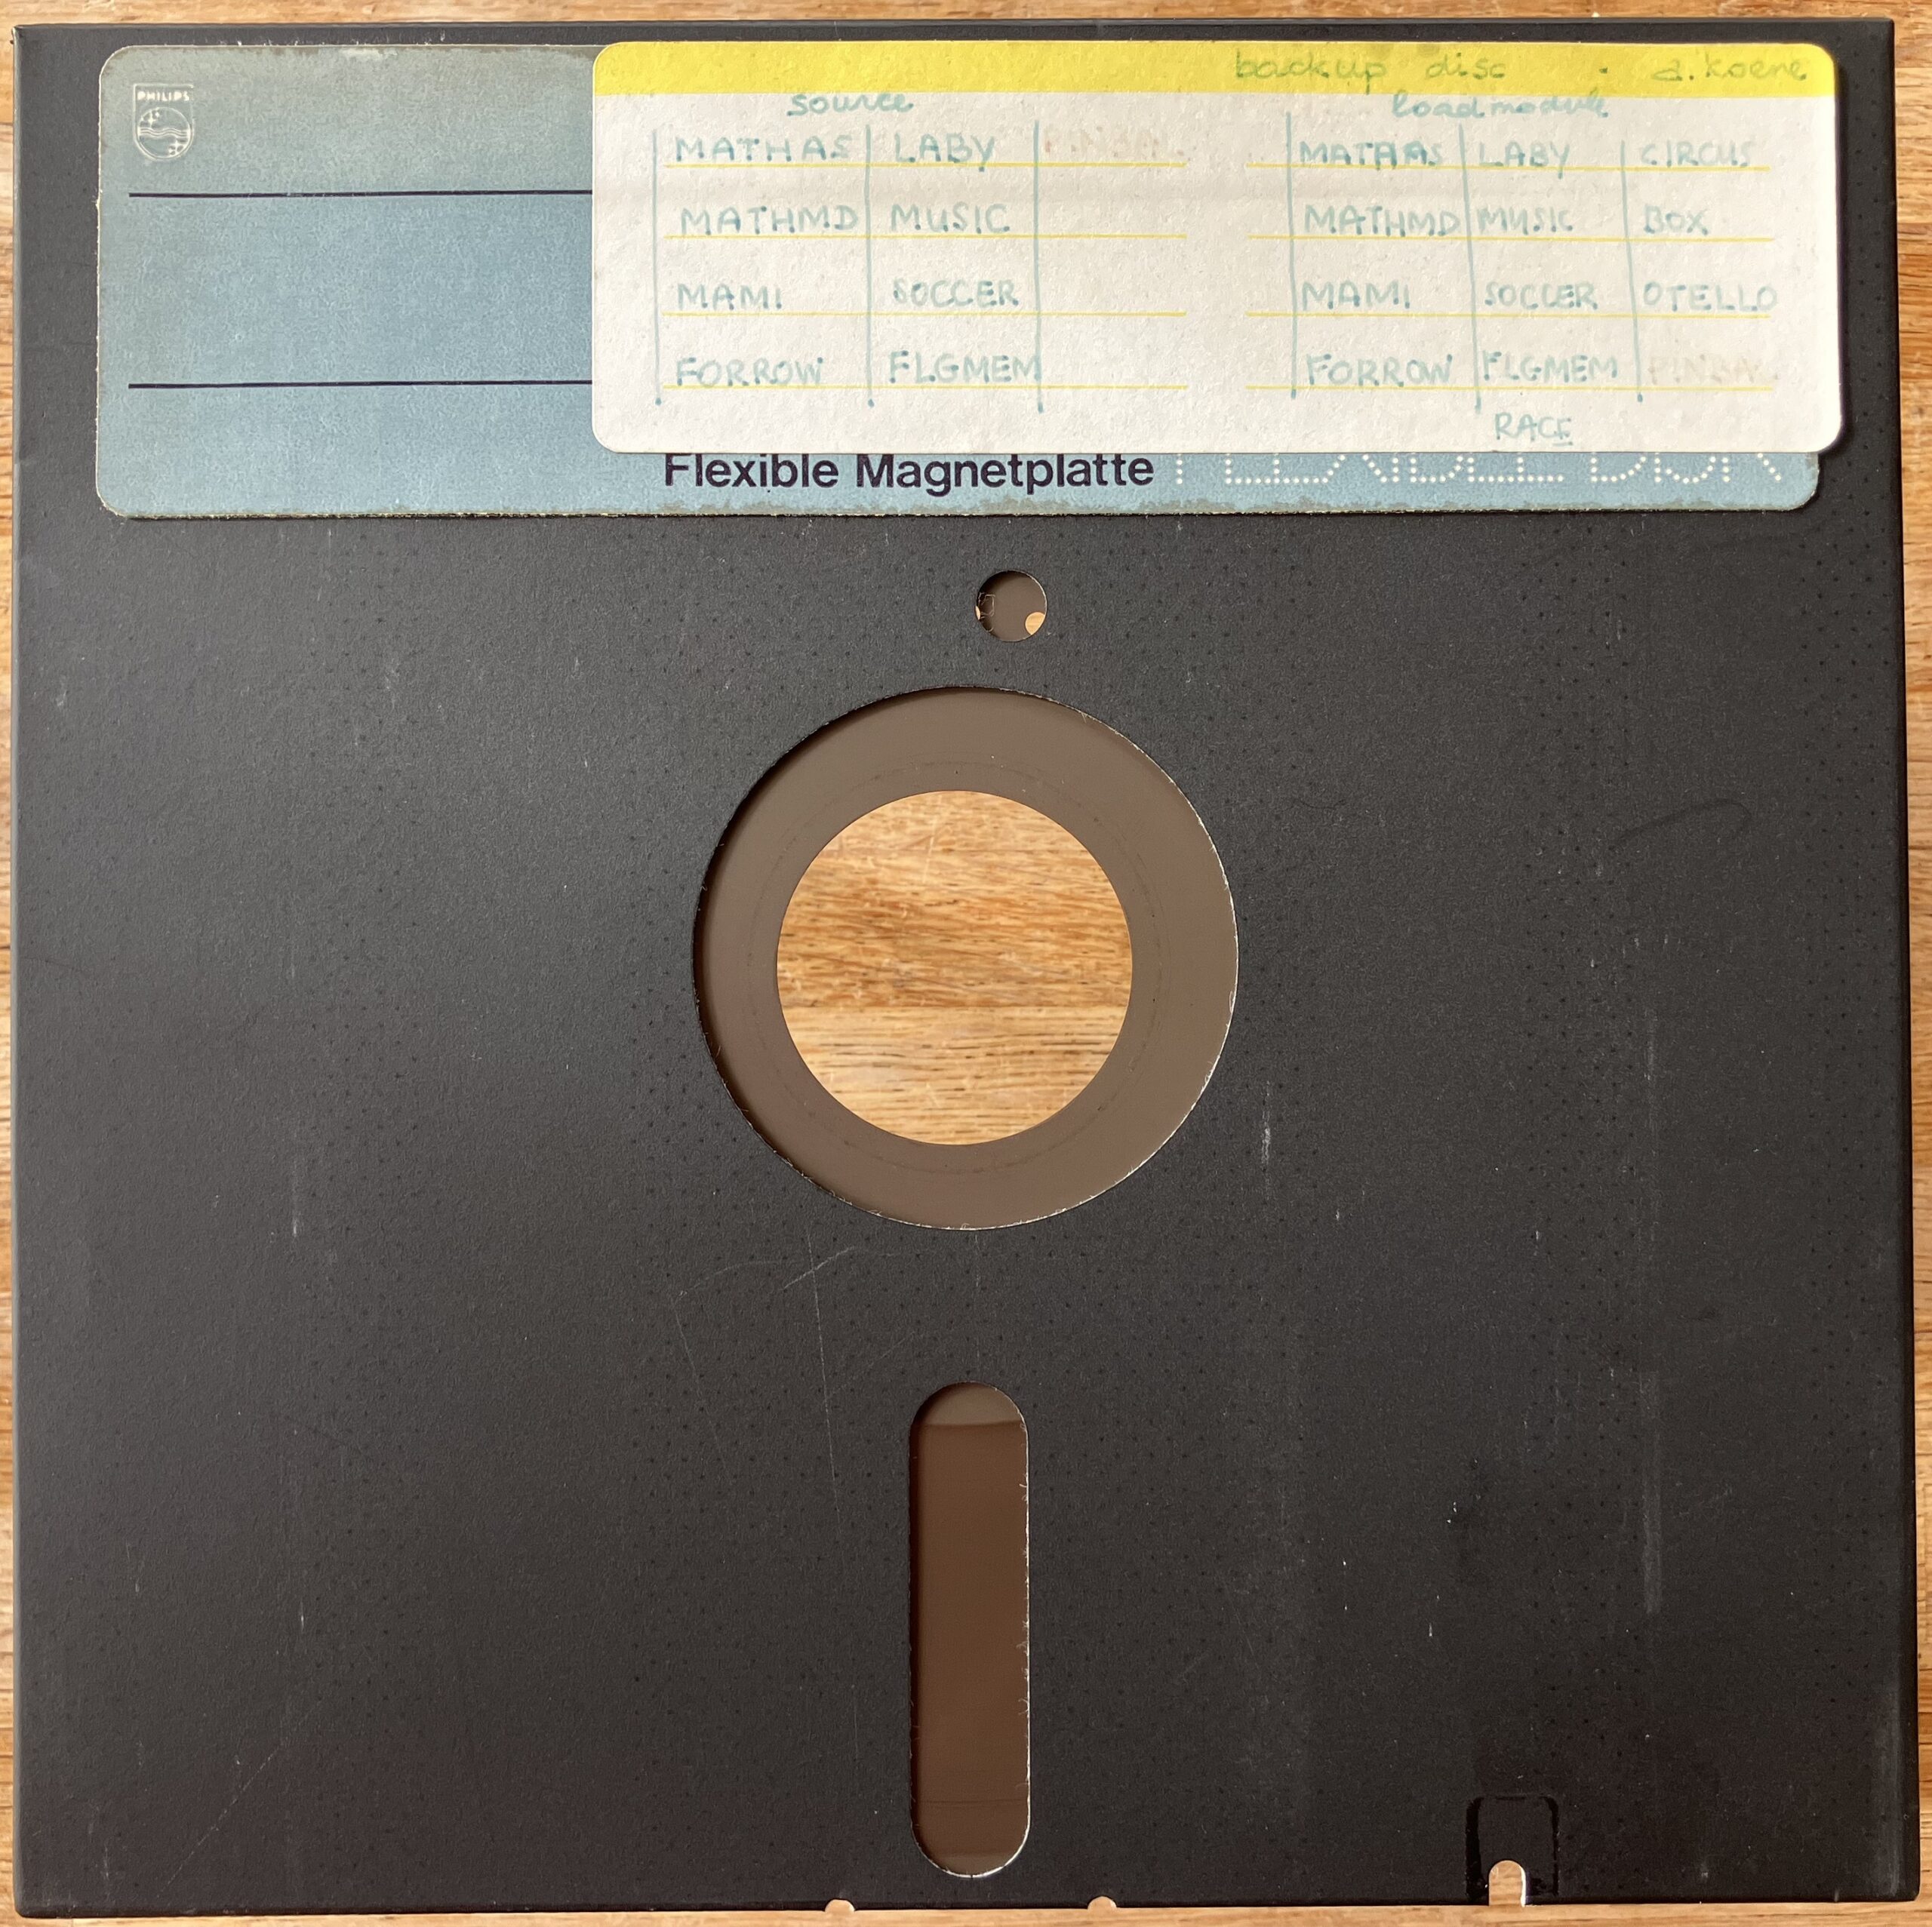
HM system
I finished creating images of the disks that accompanied the HM system. This was a slow process, using a hack to retrieve the disk contents from the TWIN itself. But it was well worth it, as the images reveal a treasure trove of information. Most disks contain a copy of SDOS, but disks HM19, HM20, HM21 and HM22 contain EXOS, presumable an internal experimental OS created at Philips NatLab, related to TOS. Also interesting is disk HM17: while most floppy diskettes are black, this one is white.
I was amazed to discover that this particular TWIN system had been used to develop software for the P1 computer. Disks HM23 and HM24 contain sources for Popmon and other software for the P1.
Computer museum University of Stuttgart
The computer museum of University Stuttgart provides 21 disk images of floppy disks. You can download them from their FTP site. The images have a twin extension. Twin files are a simple multiple of 130 byte sequences: one byte holding the track number, one byte for the sector, followed by the 128 bytes of that sector. Converting from twin format to raw disk images is a matter of skipping two bytes, copying 128 bytes, and repeating that until sector 32 of track 77 has been copied. I extracted the files on each of the images. You can download the listing and files below (raw disk images can be dowloaded above).
The Stuttgart images are interesting because they appear to contain sources of most of the modules for SDOS — but sadly not the souces for SDOS itself. Nevertheless these sources are a tremendous help when disassembling and reverse-engineering TOS and SDOS.
Millennium on bitsavers.org
The Millennium area on bitsavers.org contains a file called Millennium_internal_floppies.zip. The 82 images therein include images of TEKDOS, but also disks for the CP/M operating system. I have not verified whether these images actually work on a Signetics TWIN, and as far as I know CP/M was never released by either Signetics, Millennium or Tektronix.
Tektronix on bitsavers.org
The Tektronix area on bitsavers.org provides 3 images of TEKDOS, but also a collection of disks apparently from a Belgian company that developed games for consoles or arcade machines. I have not looked closely at these disks.
Dumping a disk
The TWIN system can boot into TOS or SDOS, but lacks ways to read out the entire contents of the disks without changing any of the disks themselves. Lacking suitable blank 8 inch floppy disks, there is also no way to create and assemble a utility program to extract a disk image.
I found a work-around, based on two observations. The first is that SDOS will not load a module from disk if that module is already present in memory. For example, it is easy to see that the first invocation of STATUS will load its module from disk, but subsequent invocations of STATUS will will execute that command without any disk access. The second observation is that the EXAM utility can be used to modify master memory. According to the manual EXAM is used to inspect and modify slave memory. However, if the address is preceded by an asterisk (as in EXAM *1500) then master memory is used instead. This option has not been documented in any available documentation.
The Stuttgart disk images contain sources for several modules, including those for DUMP and EXAM. These source codes reveal the use of the asterisk as a prefix to indicate an address in master memory. The modules for which the source code is thus available belong to SDOS version 4.2, but the same notation works for TOS version 1 as well. Disassembling the modules for other SDOS versions shows that this feature is present in all SDOS versions.
Combining both observations can be used to inject any command. First, you execute a module that uses overlay area 1, for example a COPY command without parameters. This command will immediately terminate with an error message (missing arguments), but will mark that command as loaded into memory. You then use EXAM *1500 to enter new bytes for any program of choice into memory. My MiniBee terminal emulation utility has a handy ‘slowdown’ feature for this. Then, entering COPY at the command prompt will then execute your new program at address 1500, as SDOS assumes that overlay 1 still contains the module for the COPY command.
I wrote a short utility (see the button below) to read each sector on disk 0, starting at sector 0 of track 0 up to sector 31 of track 77, and write the contents of that sector in hexadecimal digits to the console. If you use a computer with a serial interface instead of the TWIN terminal it is easy to capture the output into a file that can be processed further. When a sector cannot be read for whatever reason the program retries. After 20 tries, an error is reported and the contents of that sector is assumed to be all zeroes.
I used this utility to read the floppy in both drives available in the TWIN disk cabinet. Each invocation on each drive may give slightly different results; sometimes an unreadable sector in one drive may be readable in another drive. I manually combine the program output from multiple drives and multiple runs to obtain a final best-effort disk image. It is then trivial to convert the textual output into a binary image (e.g. on Unix-like systems use the xxd -r -p command).
Note: Technical hardware note HW006 mentions how the master CPU card can be modified to support a console speed of 2400 baud. By extension, connecting Point A to E15 pin 3 will set the connection to 9600 baud (which is the highest speed supported by the TWIN/MiniBee terminal). This gives a significant speedup to the diskdumper routine.